
I baked five loaves of banana bread in four days. My kitchen smelled like a five-star Parisian patisserie, my counters were sticky with caramel-like banana drippings, and my freezer was packed with foil-wrapped loaves. I was obsessed with fixing the biggest lie in home baking: the idea that melted butter or vegetable oil produces great banana bread.
Let me be brutally honest with you. Most banana bread recipes on the internet taste like sweet, rubbery sponge cake. Food bloggers tell you to throw melted butter and white sugar into a bowl with three yellow bananas, bake it for an hour, and pretend it is bakery quality. It is not. It is bland, it is one-dimensional, and it dries out into sawdust by tomorrow morning.
We are not doing that today.
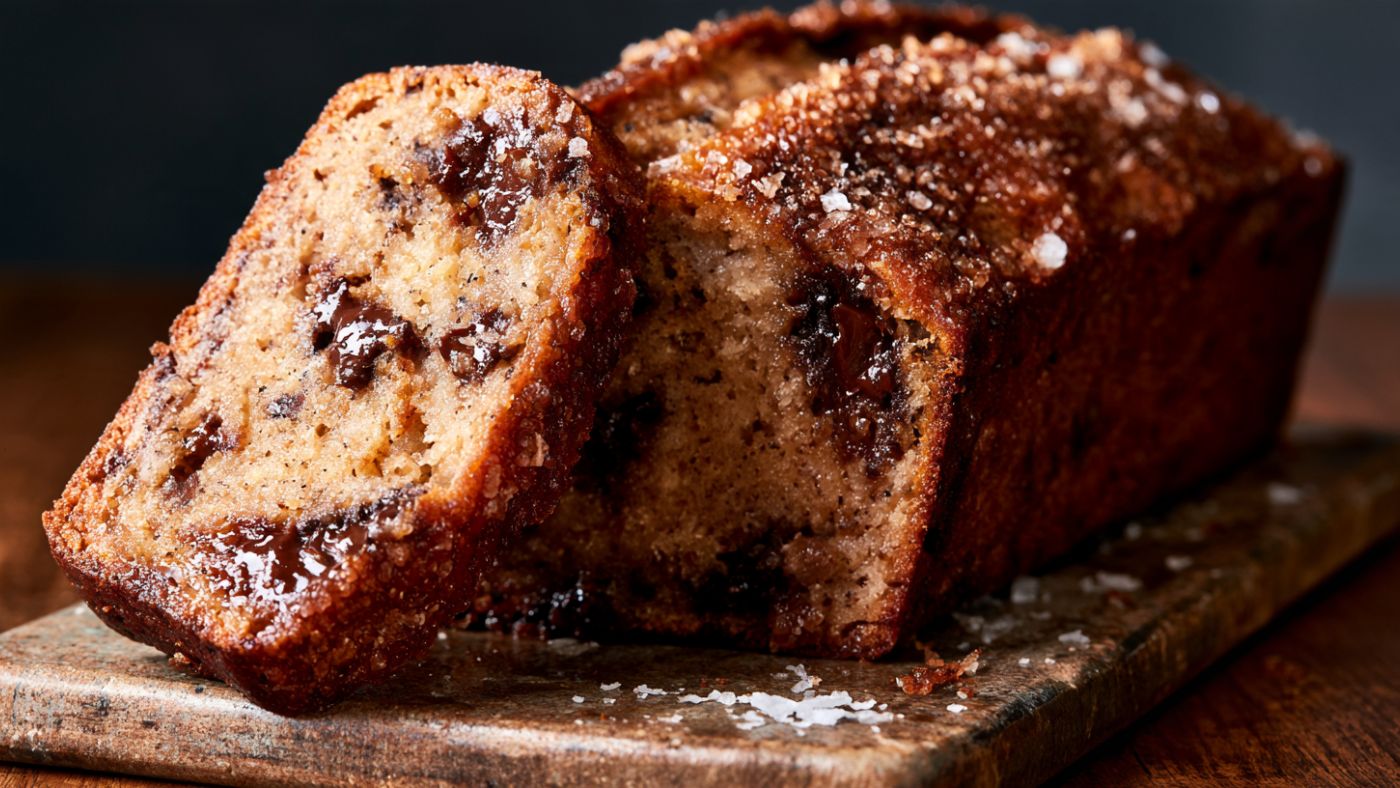
We are making the ultimate Salted Brown Butter Banana Bread. We are taking basic pantry butter, toasting the milk solids until they taste like hazelnut toffee, and pairing them with dark brown molasses sugar and deeply caramelized overripe bananas. Top it with a crackly turbinado sugar lid and a pinch of flaky salt, and you will never make regular banana bread again.
Why Brown Butter Changes Everything
Butter is roughly 80 percent milk fat, 16 to 18 percent water, and 2 percent milk protein. When you melt standard butter into batter, that water dilutes your ingredients without adding flavor.
When you brown butter, you cook off that water completely. As the moisture sizzles away, the milk proteins sink to the bottom of the pan and undergo the Maillard reaction. Those tiny proteins caramelize and toast into golden brown specks that burst with nutty, toffee-like complexity.
This accomplishes two critical baking tricks:
- Intense Flavor Infusion: It swaps bland, greasy moisture for deep, roasted hazelnut notes that cut straight through the heavy sweetness of bananas.
- Moisture Balance: Because the butter lost its water content during browning, we can pack in more actual mashed banana without turning the center into gummy, undercooked sludge.
The result is a bread that stays ridiculously tender and moist for nearly a full week.
The Four Secrets to a Flawless Bakery Loaf
Do not skip these four rules. I made every rookie mistake during testing so you can nail it on your very first try.
1. Use Blackened, Gross Bananas. Yellow bananas with cute brown polka dots belong on your oatmeal, not in this batter. You want bananas that look like they belong in the compost bin: soft, heavily blackened, and intensely fragrant. As bananas ripen, their starches convert directly into simple sugars. Black bananas bring maximum sweetness, liquid moisture, and concentrated fruit flavor.
2. Leave Small Banana Chunks. When you mash your bananas, do not puree them into baby food. Mash them with a fork or potato masher until broken down, but leave plenty of dime-sized chunks intact. Those little pockets melt into juicy fruit deposits throughout the crumb as the loaf bakes.
3. Do Not Overmix the Flour. The second your dry flour touches the wet banana-butter base, gluten starts forming. If you attack the batter with a whisk, you develop a tight gluten web that turns your quick bread into a dense, chewy brick. Switch to a silicone spatula and fold gently until the dry flour pockets just disappear. Stop right there.
4. The Foil Tent Is Mandatory. Because of the dark brown sugar and the turbinado sugar crust, the top of this loaf will develop a stunning mahogany color around minute 35. Do not panic, and do not pull it out early. Simply drape a sheet of aluminum foil loosely over the pan like a tent. This shields the top crust from burning while allowing the heat to finish cooking the dense center.
Substitutions and Dietary Swaps
You can customize this loaf based on what is in your pantry or who is eating breakfast at your table.
Flour Choices: This recipe was calibrated using standard unbleached all-purpose flour. If you want a gluten-free version, use a high-quality 1-to-1 gluten-free baking flour that contains xanthan gum (such as Bob’s Red Mill 1-to-1 Baking Flour or King Arthur Measure for Measure). The texture is shockingly close to the original.
Chocolate and Nut Add-Ins: I love folding in a half cup of chopped 70 percent dark chocolate chunks. The bitter cacao cuts through the buttery crumb in the best way possible. If you love crunch, toast a half cup of chopped walnuts or pecans in a dry skillet for three minutes before folding them into the batter.
Dairy-Free Adaptation: Yes, you can brown dairy-free butter, but you have to use the right kind. Standard oil-based tub margarines will not brown because they lack milk proteins. Use a cashew-based or cultured plant butter block (like Miyoko’s European Style Cultured Vegan Butter). It browns with real toasted solids and delivers incredible nutty richness.
Sugar Adjustments: Dark brown sugar brings moisture and caramel notes from molasses. Light brown sugar works fine as a direct substitute. Avoid replacing all the sugar with liquid sweeteners like maple syrup or honey, because the extra liquid will throw off the batter hydration and make the bread sink in the center.
Bennett’s Troubleshooting Guide
Baking quick breads can be tricky because loaf pans are deep and batter is dense. Here is how to diagnose and fix any issues on the fly.
Why did my banana bread sink in the middle? This almost always happens for two reasons: expired baking soda or opening the oven door too early. If your leavener is old, the bread will puff up from steam and collapse as soon as the oven cools. Also, do not open the oven door during the first 30 minutes of baking. That sudden rush of cold air can collapse the delicate air pockets before the crumb sets.
How do I know when the center is fully baked? Forget the old toothpick test. Melted chocolate chunks or a soft pocket of banana can coat a toothpick and trick you into thinking the bread is still raw. Use an instant-read digital food thermometer instead. Push the probe directly into the center of the loaf. When it reads between 200 and 205 degrees Fahrenheit, the crumb is completely set and ready to pull.
Can I use frozen bananas? Absolutely. Thaw your frozen bananas completely in a bowl at room temperature. You will notice a puddle of clear liquid separating from the banana pulp. Do not dump that liquid out! It is concentrated banana nectar packed with natural sugar. Mash the bananas directly in that liquid and dump the entire mixture into your batter.
Storage and The Next-Day Skillet Hack
Banana bread is one of the rare baked goods that tastes significantly better on day two. As the loaf rests, the moisture from the bananas distributes evenly through the crumb, and the brown butter flavors intensify.
Room Temperature Storage: Wrap the cooled loaf tightly in plastic wrap or store it in an airtight container at room temperature for up to four days. Do not store it in the refrigerator, as the cold air recrystallizes the starches and dries the crumb out prematurely.
Freezer Storage: Slice the loaf into individual thick slabs. Wrap each slice in plastic wrap, then stack them inside a gallon freezer bag. They freeze beautifully for up to three months. Pull out a single slice whenever a craving hits and thaw on the counter for 30 minutes.
Bennett’s Ultimate Skillet Sear: If you want to experience pure breakfast luxury, grab a day-old slice. Heat a cast iron skillet over medium heat and drop in a pat of salted butter. Lay your banana bread slice flat in the bubbling butter and sear it for two minutes per side until the edges turn golden brown and caramelized. The outside turns shatteringly crisp while the center gets molten soft. Serve it hot with a cup of black coffee.